|
Add Even More Wampum To Your Caricatures
|
| Caricature and Drawing Newsletter for October / November, 2006 October / November 2006
||||||||||||||||||||||||||||||||||||||||||||||||||||||||||||||||||||||||||||||||||||||||||||||||||||||||||||||||||||||||||||||||||||||||||||||||||||||||||||||||||||||||||||||||||| Your October / November 2006 YouCanDraw.com Communiqué |||||||||||||||||||||||||||||||||||||||||||||||||||||||||||||||||||||||||||||||||||||||||||||||||||||||||||||||||||||||||||||||||||||||||||||||||||||||||||||||||||||||||||||||||||
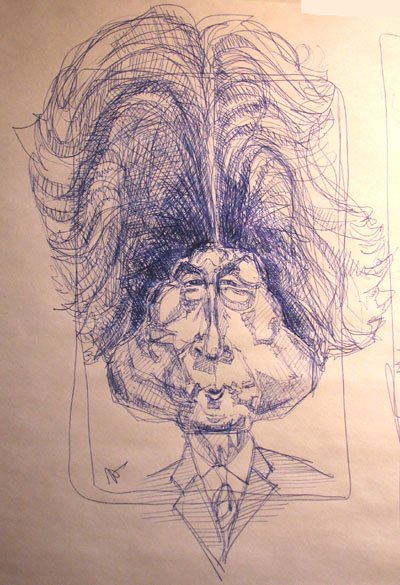
Howdy all! In this issue we're going to go back to the last issue and re-exaggerate the caricature we did in that one: the one of Japanese Prime Minister Junichiro Koizumi A couple notes: 1) If you're just signing up, or you're feeling overwhelmed, or you need a review, make sure you get back to the "From The Top" section in the Archives. (It's right there front and center when you arrive at this page.) Go through it one step at a time and take enough time to let each lesson really sink in. And do the assignments! You can't produce a finished tangible drawing in your head :-) and... 2) hey, it's only been five weeks since the last e-zine. I'm getting back into the swing of things :-)
Heightening Why do this? Pretty simple. Since we're talking about exaggeration, you can always go crazier and crazier with each subsequent exaggeration. In improvisational comedy they call this "heightening". What's heightening? It's just more exaggeration. For instance if you're doing a scene about spilling hot soup in your lap (pretend hot soup of course :-), the first time you run through it, you just kinda go "oops" and push yourself away from the table. Director goes "Heighten it". The next time you spill the soup, you scream and do a couple cartwheels. "Heighten more!" the director screams. Next you scream, do cartwheels, and start telling the waiter he has family of origin issues. "Again!!" the director screams... This last time, you scream, you fall on the floor, cry, kick, start screaming this always happens to you because your mother beat you as a child, you start calling for the the national guard, your partner starts acting like a reporter for Fox news: "Reporting live from Boston sea Market on Commons Street where a man has spilled soup on himself for the third time today, has sustained permanent stains to his new Hagar slacks, wife expected to be quite upset. Our medical corespondent has reported no skin burns but the the fire department is now hosing him down with the full power of the 1500 LB pressure fire hoses while a catholic priest has been called to read last rites at the scene, he's flipping around like a leaf in the wind...What's that? What's that? I can hear the Homeland security helicopters, their spot lights scanning the area as we speak, and I'm quite sure this man's mother beat him as a child...over to you Bill". Heightening! Get it? Just keep doing and redoing until the scene, speaking lines, physical actions, etc. get ever crazier and more absurd with each pass. That's the exact same idea here - except you're doing it with a drawing.
Let's dive on in.
Original photo on the right. Caricature number one on the left. Need to get to the last ezine to see caricature number one? Click to see the last ezine where we started the contour drawing / caricature of Japan's Prime Minister Here's a better version of the original photo we've been working from:
...and just below is the first contour drawing of Mr. Koizumi:
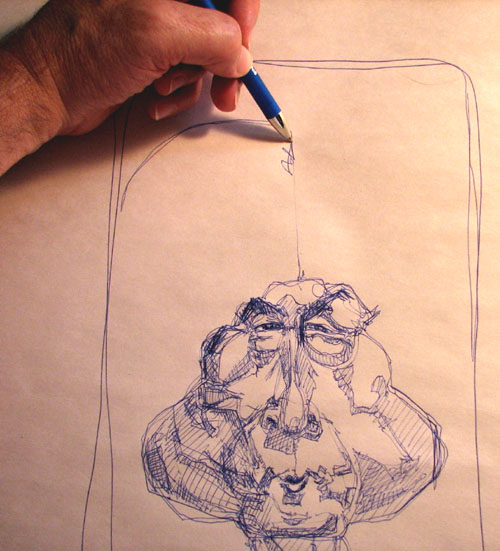
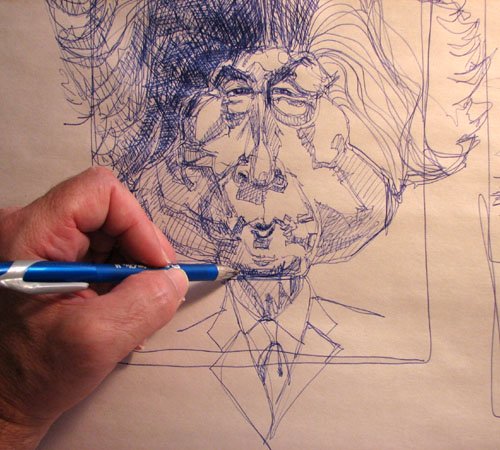
Here's the set up: I've got the computer screen in front of me and a large pad of newsprint on my lap. I'm looking at the computer screen and the pad of paper is resting almost on the computer keyboard. I'm going to begin by drawing a format (that's the bounding rectangular frame I'm going to draw inside of). I I might go out of the lines and I might not. It's just a guide right now. Ok. Lets begin with the nose. 2) having the original photo in front of me gives me a reference to - and this is key - for making sure what I I exaggerate still resembles the Prime Minister. Getting going Here's the nose and the left eye and the left eyebrow. I know I'm going to make even bigger hair so I leave lots of room at the top of the format for filling up with hair:
Staying true to a contour style drawing, I try to keep my pen on the paper all the time. Next pic: moving down across the apron of the upper lip to the outline of the lower edge of the upper lip:
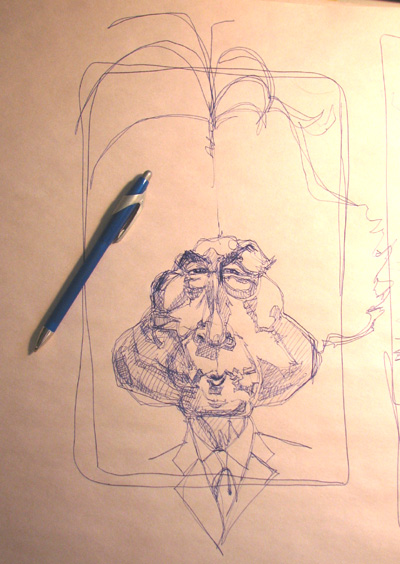
In the next picture below I've swung down to the chin, and yes I lifted the pen (but just barely) to get at the shadow under the lower lip and jump to the skin crease just below the lips and to the right (the prime ministers right) that takes you down to the chin. You can also see I've added a roughed in jaw line. And I've made it pretty far out there too. (Athletic jaws always require a large leap of faith to make them look athletic in a caricature) notice how asymmetric the jaw line is (round on the left, pointy on the right - never worry about perfection! Nothing is perfect and everything is perfect all at the same time :-) :
Let's compare what we just drew to the original caricature - what do you see as different? Compare angles the lines of the jaw make with the vertical and horizontal lines of the format. Compare the proportions of the width of eyes (width of outside corner to outside corner, and inside corner of one eye to inside corner of the other eye) to the total width of the jaw:
Upper lip Here's the original again for reference. I want you to look at that upper lip and compare how both caricatures pretty closely mimic the shape and course of that line of the upper lip. To me the upper lip of Mr. PM is one of three or four keys to capturing his likeness:
Now (next pic below) we're filling in the eyes - mostly just a little bit of dark iris (the iris is the colored part of your eye) and I've begun filling in the shadow shapes. Squint your eyes and go back and forth between the pictures (the original above and the drawing below) and see if you can't start seeing those shadow shapes as distinct shapes. Ask yourself if the shadow shapes I've drawn come close you how you see the shadow shapes on the original photo just above. Also try drawing those shapes yourself - you can interpret them differently and still get a great likeness. (I had to lift the pen to cross hatch the shadows - also, notice how with just the little bit of shadowing around - for example - the eyes make the eyes just jump out...at least I think they do):
More shadowing - squint and compare the pic below to the original photo):
Hey, that's forming up pretty good :-). Let's keep moving. Next pic: now just darkening up the eyebrows - filling in the shapes I drew previously. I'm also squinting and asking myself "where is the darkest area of the eyebrows, where is the brightest spot and where is a middle tone?" You can drive yourself crazy trying to capture all the different gradations of tone. Tone is concerned with the depth of darkness a shape or part contains. It could be next to black or have the intensity of pure white light. Looking for every grade or shade between those two limits can drive you nuts. Squinting limits shade and tone to something manageable. I keep it limited to these three: black (or darkest), to white of paper, and lastly a middle tone in between the extremes:
In the pic above I've also begun adding the neck and sport coat / tie. In the following picture, I've done a pretty rapid fire drawing of the hand (lots of foreshortening in the hand - and if you don't understand "foreshortening", search it out in your source book (type "foreshortening" into the "find" function and you'll get tons of references)...oops! I just realized the next picture is the original caricature. Fooled myself. Well, your job is to compare the one above and below:
Next pic below: stepping back to compare...and what's that off to the right? That's just a mock drawing of a lighthouse I'm getting ready to paint - (I'll remind you how learning to draw using the "right brain techniques" can be applied to drawing anything - and makes painting so so much easier. :-)
Just for funzies here's the whole lighthouse drawing, could use a gull or two:
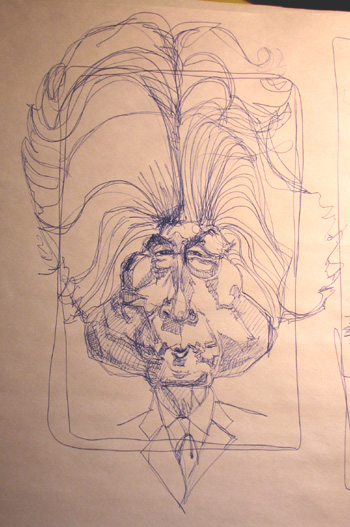
Hair! Next pic: preparing for big hair! Starting with the hair part and pulling it up high! Note how all the lines are pretty much connected from forehead to hair-part to the first arch of hair:
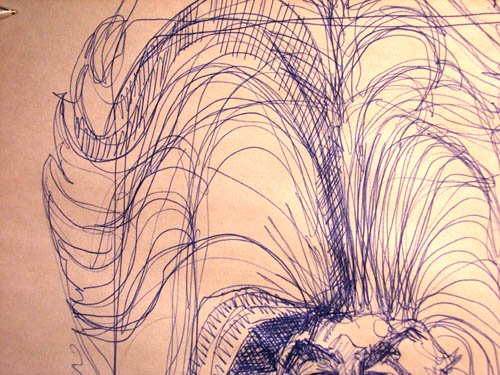
But that's not high enough! I started off talking about "heightening", well lets really heighten this bouffant-able head of toupee. Took three tries before I'm getting half happy with the height ("but it's perrrfect either way Jeff". Yea, yea, yea):
Now we're talking :-) Compare to original caricature:
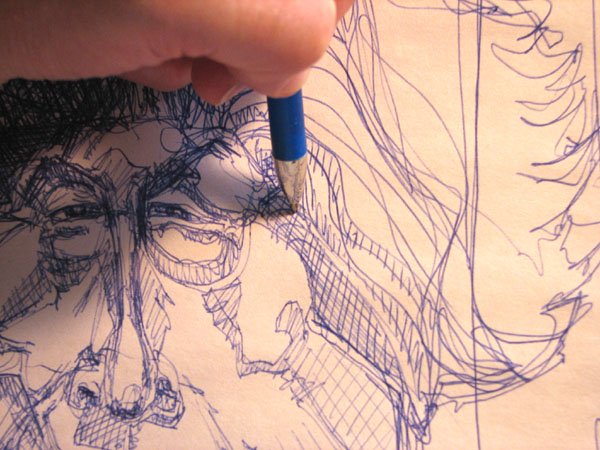
Ug! I just realized I must now cross hatch all that hair in. That's why I started painting: one brush stroke that literally takes half a second while cross hatching the same area will take me half an hour. Of course, taking all that time to cross hatch can really produce some great textures you'll get no other way. In the next picture I'm outlining the major hair sections. I'm referencing the original photo as I do this and I'm trying to not lift the pencil, er pen, off the paper as I do it (except to take the picture):
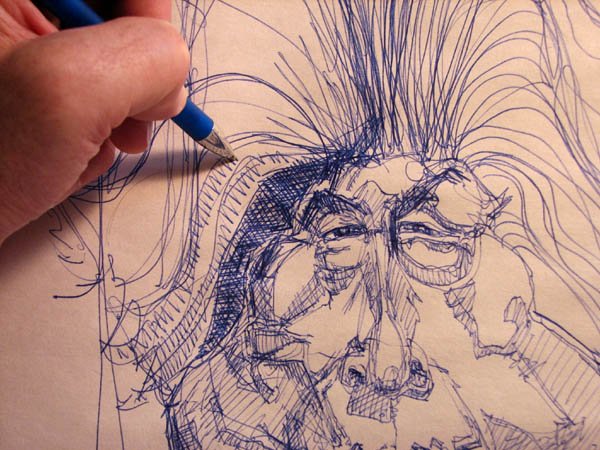
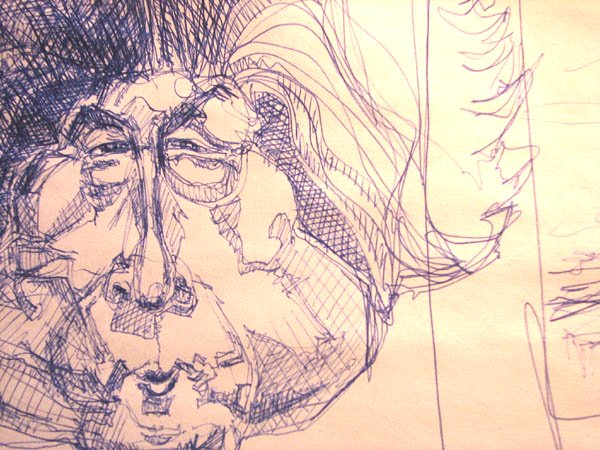
Here's a close up of some of the finer detail:
More of the same...
...10 minutes later: building up the deepest shadows and dark tones with lots of layers. Notice the different directions of the cross hatching - and see if you can't find the original format I was going to try to stay inside of:
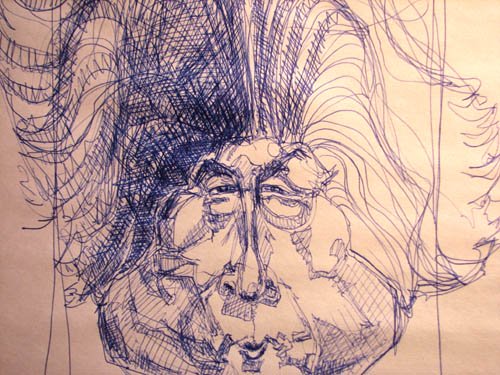
Got to make sure there are areas within the face that are as dark as the darkest areas of the hair otherwise the face and the hair won't look connected, SO I'll darken up the chin shadow and few other areas:
It's shaping up...
OK, now look at this picture (the next one) and the one following this next one and look at the different layers of hatching: can you see the different directions of the hatches?:
Convince yourself there's three layers of hatch in that patch of shadow in the hair right up against the cheekbone:
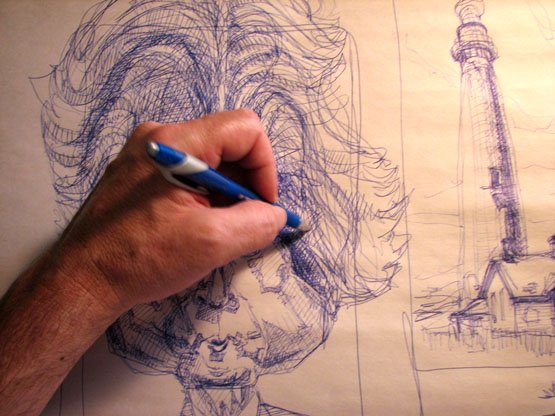
That's my hand. My wrist is getting very tired and I'm running out of ink...
Almost done!
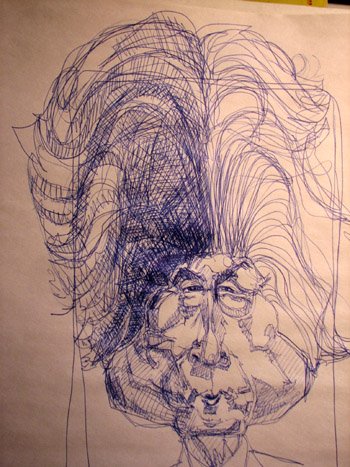
Stepping back a little bit:
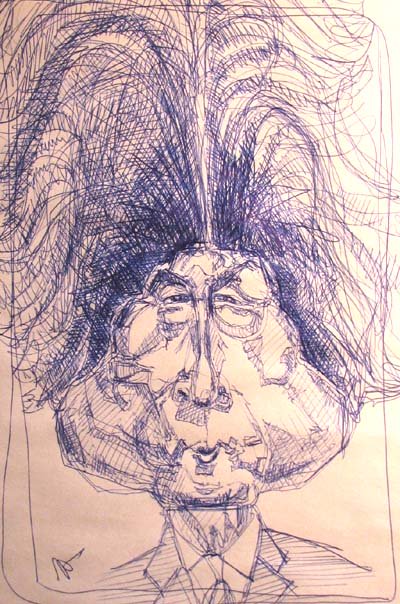
Comparing to the first caricature:
They're both different but they both still maintain a recognizable likeness to the original. Well that's my opinion anyway :-) I think I got the hair a little too dark in the second caricature (the one I did today). At least if I had taken a step back it would have occurred to me to keep all that shadowing in the hair in a narrower band closer to the actual face. That way the hair would appear more silvery and lighter and really piled up. (..."but it's perfect Jeff"...) Let me remind you again to always take a step back to size up your drawings. I don't ever do this but I'm the teacher and I'm allowed to be a hypocrite. :-) Seriously, when I get to doing these lessons I sometimes start grinding through them to get them done - and it shows in the finished drawings. When I'm more relaxed and not under a deadline (which I always miss anyway), and I take a step back, I'm always much happier with the results - but I'm still quite pleased with today's results :-) It was a blast drawing it.
Like the Prime Minister always says "I'm pleading with you, do as I say, not as I do!"
In review Evaluate the two caricatures and compare / contrast the following: The shape, size, and spacing of the eyes How far are the eyes (the middle of the eye line) from the bottom of the nose? How far is the middle of the mouth below the bottom of the nose? How far is the middle of the mouth from the bottom of the chin? How does the size of the mouth compare in both pictures? Compare the overall shape of the face in each Compare the overall shape of the hair Compare the overall shape of head and hair blurring to the best of your ability the
Next time: A lot of folks comment to me "Jeff, you do these really elaborate, detailed and cross-hatched caricatures, I just want to learn the kind you'd do at a party that aren't so detailed and you can whip off so I can make some money!" So next issue we're going to do a twenty minute "draw-off" doing as many pics as I can in twenty minutes - and I'll do them using the "contour" technique with a pen. AND, I'll do them without rushing AND I'll make them fairly detailed. I'm way out of "gig-level" speed, but this'll be fun! :-) See you then! Warmly,
Jeff -------------------------------------------------------------------------------- Kasbohm & Company's Drawing-Faces-and-Caricatures-Made-Easy.com and © Copyright, All rights reserved 1997-2006
|


